Experiencing computer slowdowns? Meet MoUSO Core Worker Process – the possible culprit behind performance hiccups. Discover its role and get quick tips to troubleshoot in this guide.
Picture a smoother computer experience. By the end, you’ll know how to optimize performance effortlessly.
Ready for a faster PC? Dive into MoUSO Core Worker Process solutions now!
What is MoUSO Worker Process?
The MoUSO Core Worker Process, also known as MoUSOCoreWorker.exe, is an integral component of the Windows Update system. Introduced in Windows 10 version 1903, this process plays a pivotal role in orchestrating the download, preparation, and installation of Windows updates. It manages update dependencies, resolves potential conflicts, and troubleshoots issues that may arise during the update process.
While the MoUSO Core Worker Process is essential for keeping your Windows system up to date, it can sometimes become a resource hog, consuming excessive amounts of memory, disk space, or CPU resources. This can lead to noticeable performance issues, including:
- Slow computer performance
- Unresponsive applications
- Frequent system crashes
What Causes MoUSO Core Worker Process High Memory/Disk/CPU Usage?
The MoUSO Core Worker Process, a crucial component of Windows updates, can sometimes consume excessive resources, leading to high memory, disk, or CPU usage. This can significantly hinder your computer’s performance, causing it to slow down, become unresponsive, or even crash.
Several factors contribute to this excessive resource consumption:
- Outdated Windows: If your Windows installation is outdated, it may contain bugs or glitches that cause the MoUSO Core Worker Process to malfunction and consume excessive resources.
- Orchestrator Service issues: The Orchestrator Service is a background service responsible for managing update sessions. If this service is experiencing issues, it can lead to high resource usage by the MoUSO Core Worker Process.
- The MoUsoCoreWorker.exe is outdated: In some cases, the MoUsoCoreWorker.exe file itself may be outdated and need to be updated to the latest version.
- Background Update Activity: When Windows updates are being downloaded or installed, the MoUSO Core Worker Process may temporarily consume more resources to handle the increased workload.
- Windows Update Settings: Certain Windows Update settings, such as Delivery Optimization, can contribute to high resource usage.
Is MoUSO Core Worker Process Malware?
No, the MoUSO Core Worker Process is not malware. It is a legitimate Windows process that plays a crucial role in managing the installation of Windows updates. It is part of the Unified Update Platform (UUP), a new update delivery mechanism introduced in Windows 10.
Some malware programs may disguise themselves as the MoUSO Core Worker Process to avoid detection. However, the genuine MoUSOCoreWorker.exe file is always located in the C:\Windows\System32 directory. If you are unsure about the authenticity of a file, you can scan it with a reputable antivirus or anti-malware program.
How to Fix MoUSO Core Worker Process High Memory/Disk/CPU Usage?
The MoUSO Core Worker Process, while essential for Windows updates, can sometimes consume excessive memory, disk space, or CPU resources, leading to performance issues.
Fortunately, several effective strategies can help you address this problem and restore your computer’s optimal performance. Let’s delve into a step-by-step guide to taming the MoUSO Core Worker Process and regaining control of your system’s resources.
1. Verify the Authority of MoUsoCoreWorker.exe.
Before attempting any troubleshooting steps, it’s crucial to ensure that the MoUSOCoreWorker.exe file is genuine and not a malware imposter. To verify its authenticity:
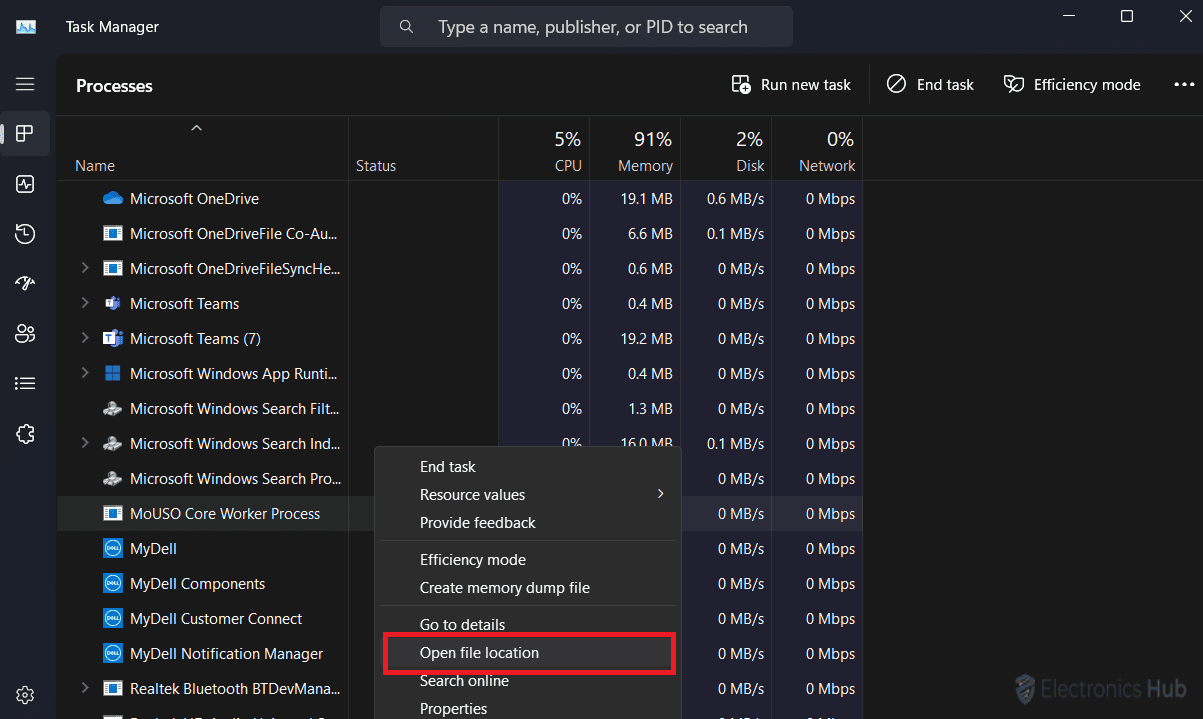
- Open Task Manager by pressing Ctrl+Shift+Esc or by searching for “Task Manager” in the Start menu.
- In the Task Manager window, look for the “MoUSO Core Worker Process” or “MoUSOCoreWorker.exe” entry in the Details tab.

- Right-click on the MoUSO Core Worker Process and select “Open file location.” This will open the folder containing the MoUSOCoreWorker.exe file.
- Verify that the file is located in the C:\Windows\UUS\amd64 directory. If the file is located in a different directory, it may be malware.Keep in mind that directory may vary according to your system compatibility, check the file location present in C Drive or not.
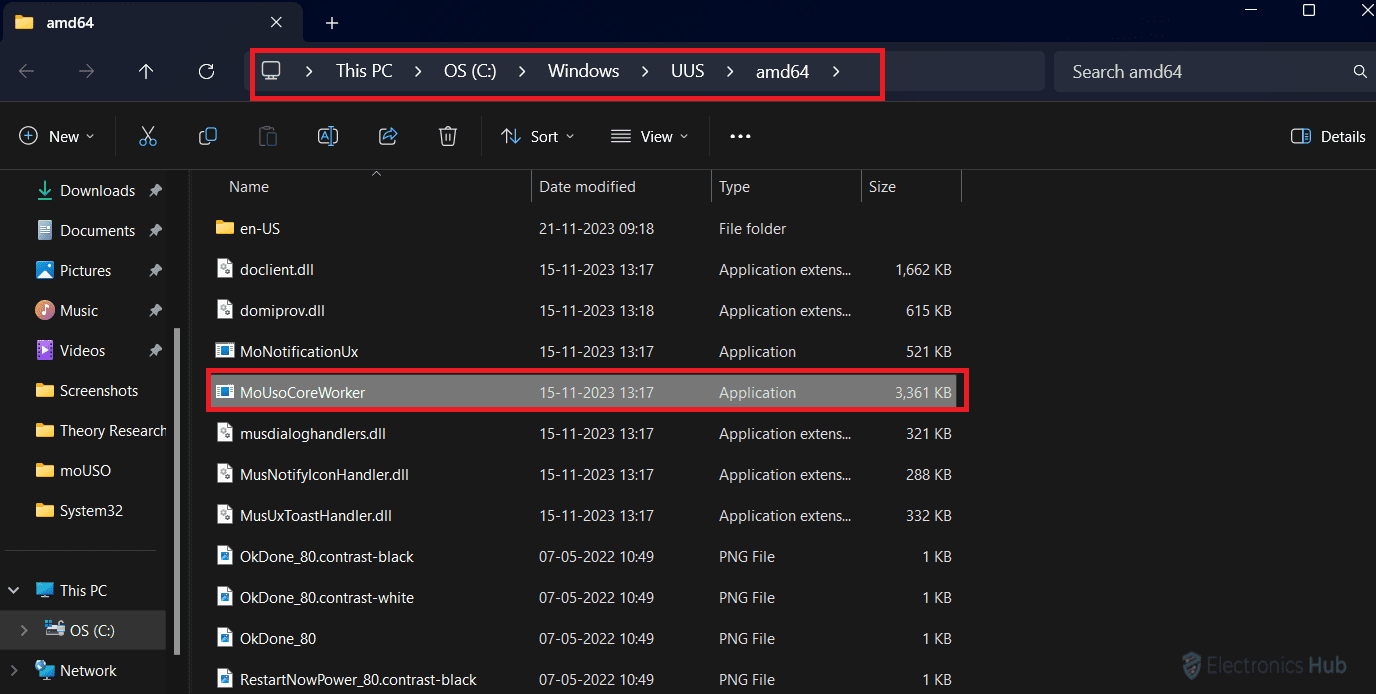
Keep in mind that directory may vary according to your system compatibility, check the file location present in C Drive or not.
2. Run Windows Update Troubleshooter.
Windows provides a built-in troubleshooter specifically designed to address Windows update-related issues:
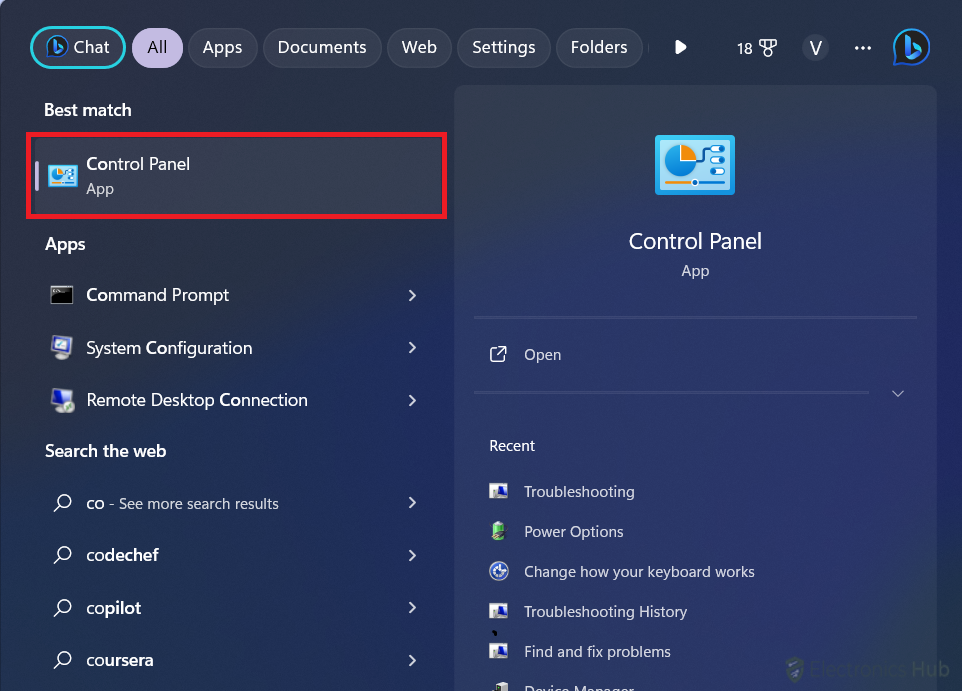
- Click on the magnifying glass icon in the taskbar to open the search bar. Type “Control Panel” into the search bar and click on the Control Panel icon when it appears in the search result.
- Use the search field in the top right corner of the Control Panel window to search for “Troubleshoot.” Click on the “Troubleshooting” header from the search results.

- Click on the Other Troubleshooters from the list. This will take you to a new page where you can see all available troubleshooters.

- Scroll down and locate the “Windows Update” troubleshooter. Click on the Run button next to it and follow on-screen instructions to troubleshoot the windows update.

- Once the troubleshooting process is complete, you can view a summary report that details any problems found and the steps taken to resolve them.
3. Install All Pending Updates
Outdated Windows installations can sometimes lead to resource usage issues with the MoUSO Core Worker Process. Ensure you have installed all available updates by:
- Click on the Start button and select “Settings.”
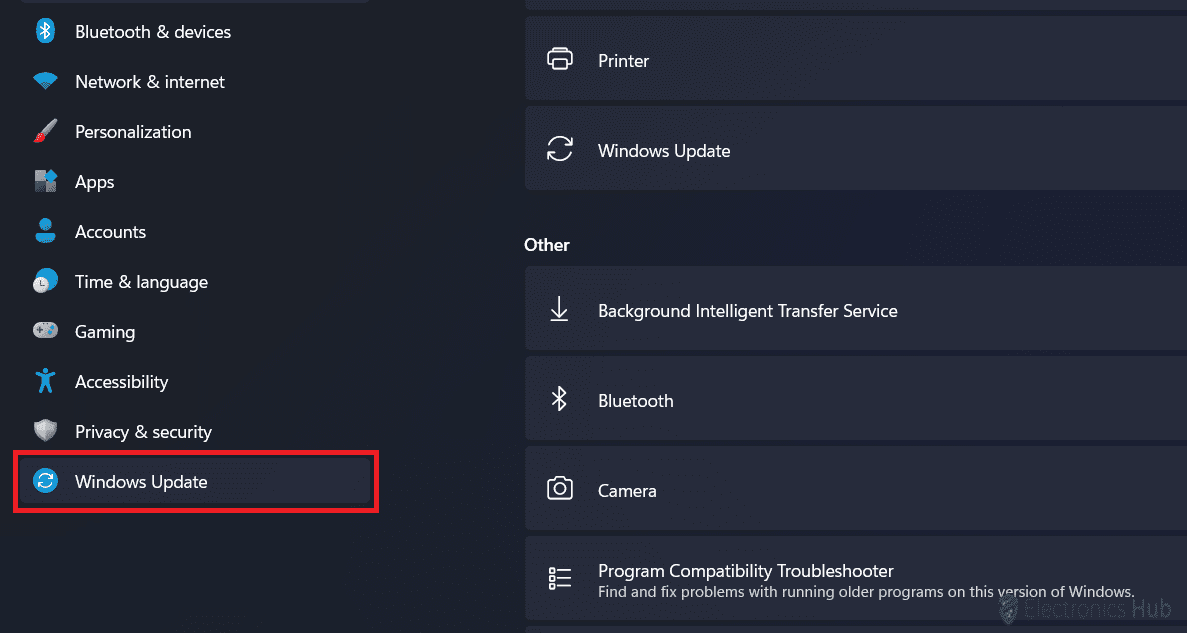
- In the Settings window, go to “Windows Update.” which is located in the left side menu.
- Click on the “Check for updates” button. This will initiate a search for available updates for your Windows installation.

- If updates are available, you will see a message indicating the number of available updates. Click on the “Download and install” or “Install now” button.

- Wait for Windows to download completely and apply the necessary updates.
- Once the updates have been installed, you may be prompted to restart your computer to apply the changes fully. If prompted, restart your computer to ensure that the updates are implemented correctly.
4. Pausing Windows Updates
If high resource usage occurs during Windows updates, you can temporarily pause them to alleviate the strain on your system.
- Click on the Start button and select “Settings.” In the Settings window, go to “Windows Update” which is located in the left side menu.
- In Windows Update settings, Navigate to the Pause Updates under the more options section.

- Click on the drop-down menu next to it. You will see a drop-down menu with different pause durations.
- Select the desired duration, such as “Pause for 1 week” or “Pause for 5 weeks.” This will postpone updates for the specified period.

- Once you are ready to resume updates, return to the Windows Update settings and click on the “Resume updates now” button.
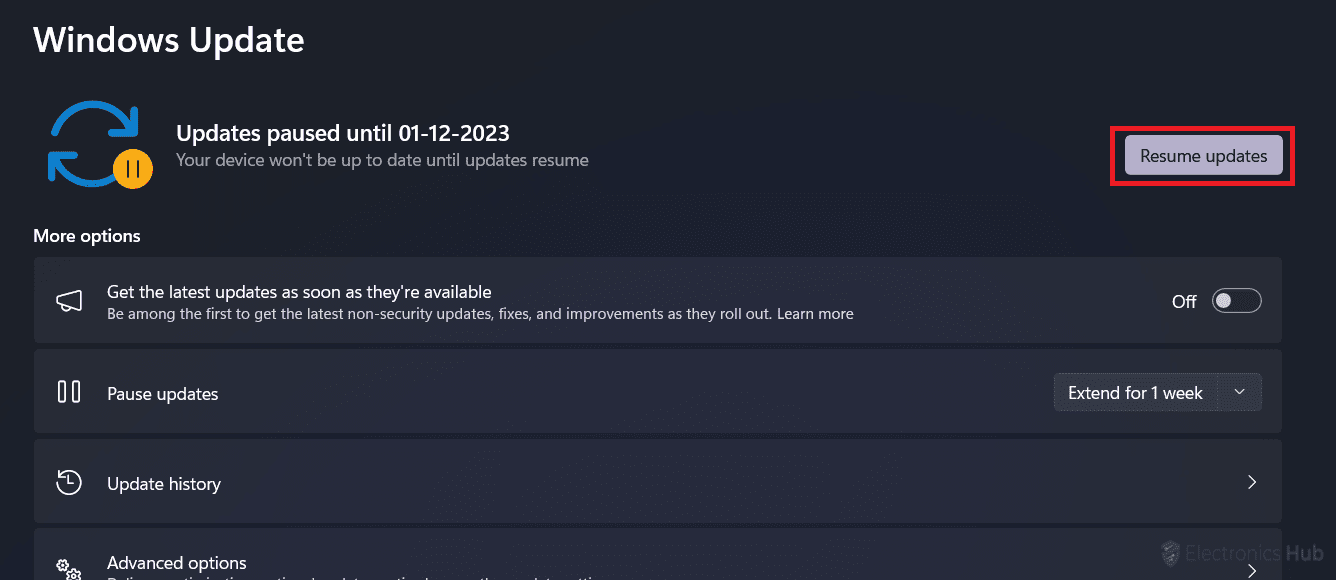
- This will initiate the download and installation of pending updates.
5. Restart the MoUSO Core Worker Process.
Sometimes, restarting the MoUSO Core Worker Process can resolve temporary glitches or resource spikes:
- Press Ctrl+Shift+Esc to open the Task Manager application.Alternatively, right click on Taskbar and select Task Manager to open. This is the built-in tool for monitoring and managing running processes, including the MoUSO Core Worker Process.
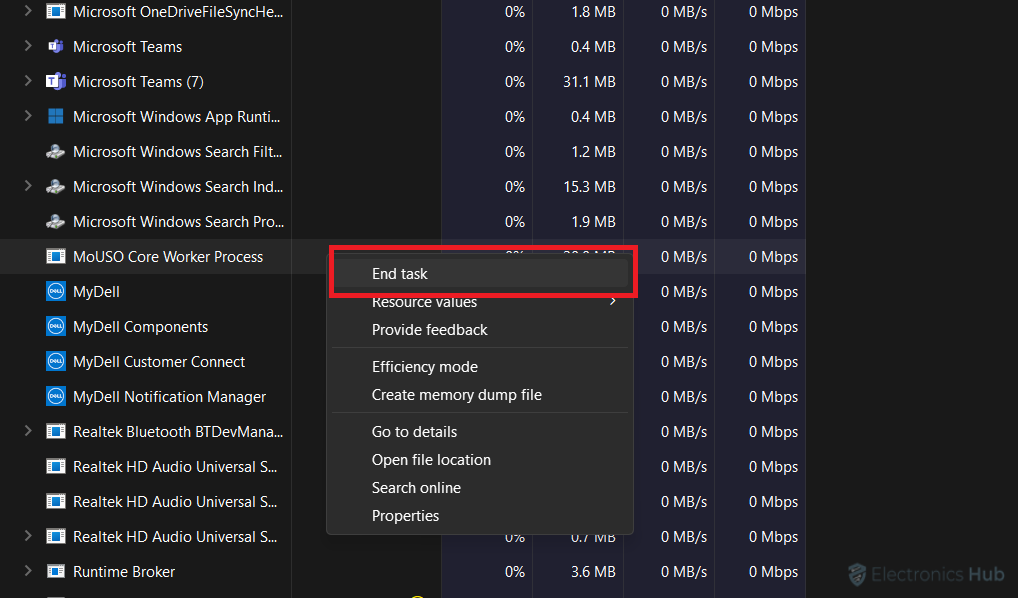
- Once the Task Manager is open, switch to the “Details” tab. Scroll down the list of processes until you find “MoUSO Core Worker Process” or “MoUSOCoreWorker.exe.”

- Once you’ve located the MoUSO Core Worker Process, right-click on it and select “End Task” from the context menu.
- After restarting the process, observe the resource usage of the MoUSO Core Worker Process to see if the high resource consumption has been resolved.
6. Disable Delivery Optimization
Delivery Optimization allows Windows to share update files with other devices, potentially increasing network activity and contributing to resource usage. To disable it:
- Press the Windows key + I to open the Settings app.
- In the Settings window, go to “Windows Update” which is located in the left side menu.
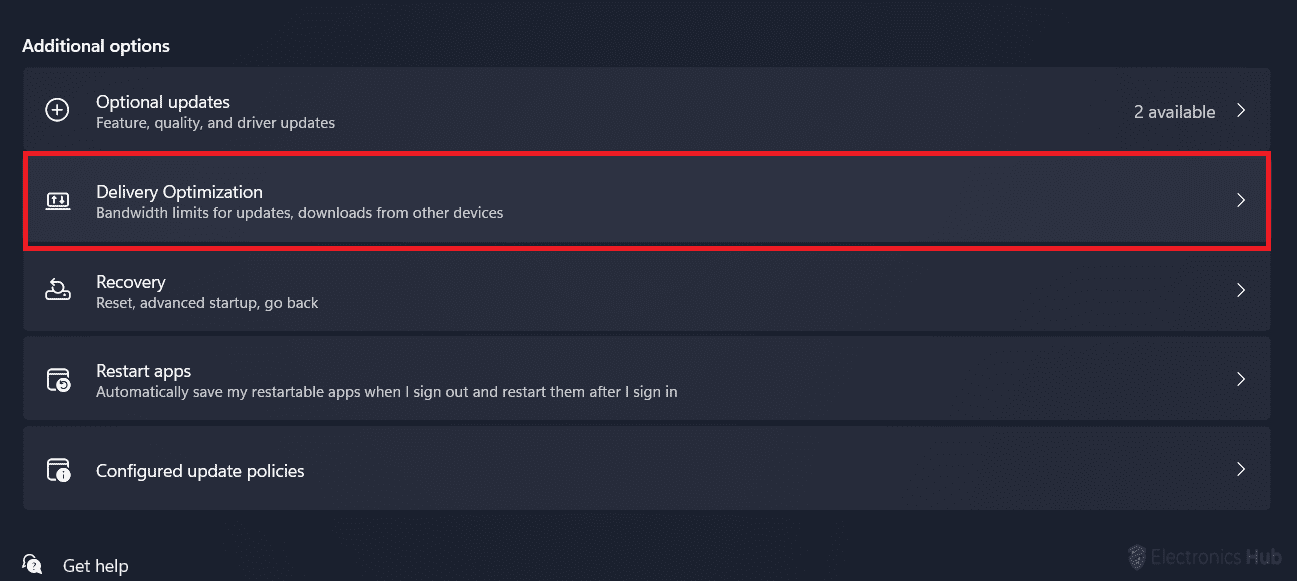
- In the Windows Update settings, scroll down and click on the “Advanced options” option.

- Under the Additional options section, locate the “Delivery Optimization” setting and click on it.
- Click on the toggle switch next to “Allow downloads for other PCs” to turn it off. This will disable Delivery Optimization, preventing your device from sharing update files with other devices.
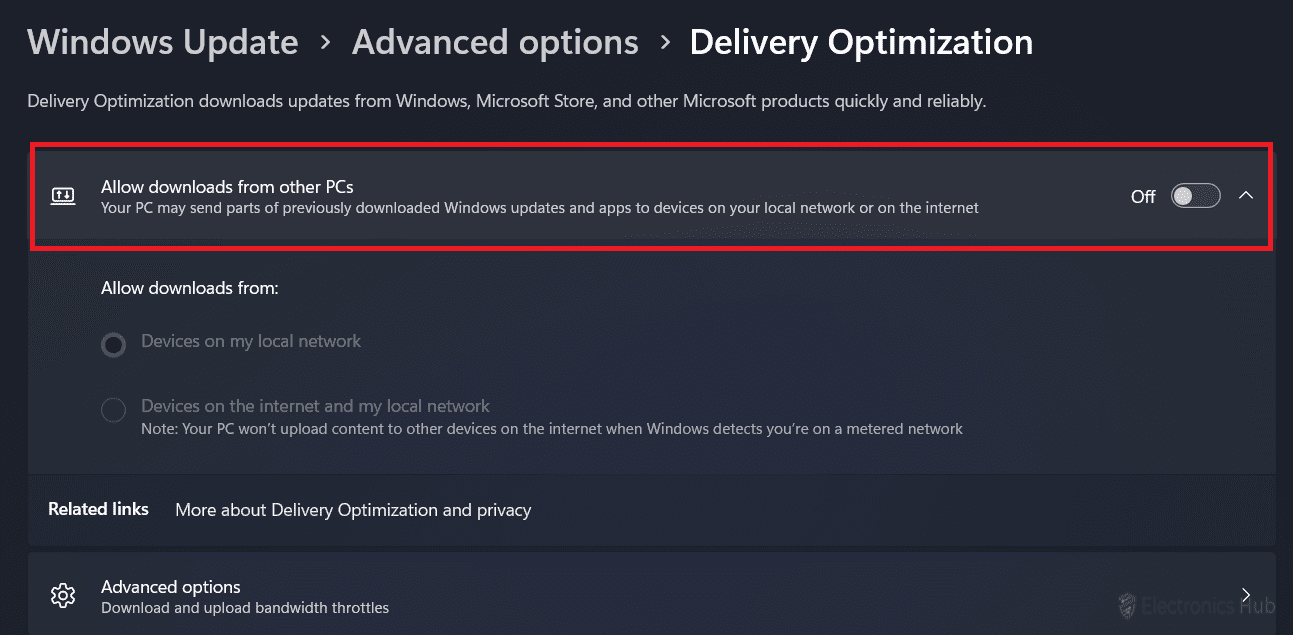
Note: If you are on a metered internet connection (an internet connection that has a data limit associated with it), we recommend that you keep Delivery Optimization enabled. This will help reduce the amount of data used when downloading updates.
7. Restart Windows Update Services & Disable the Update Orchestrator Service
Restarting these services can sometimes resolve resource usage issues:
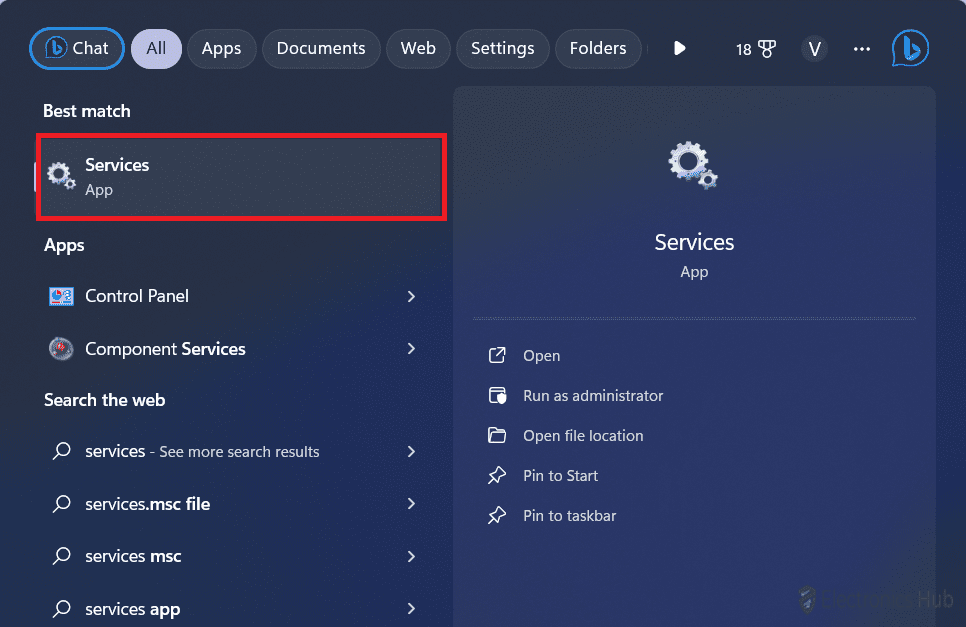
- To Restart Windows Update Services, Click on the Start button and type “Services” in the search bar. Select “Services” from the search results to open the Services application.
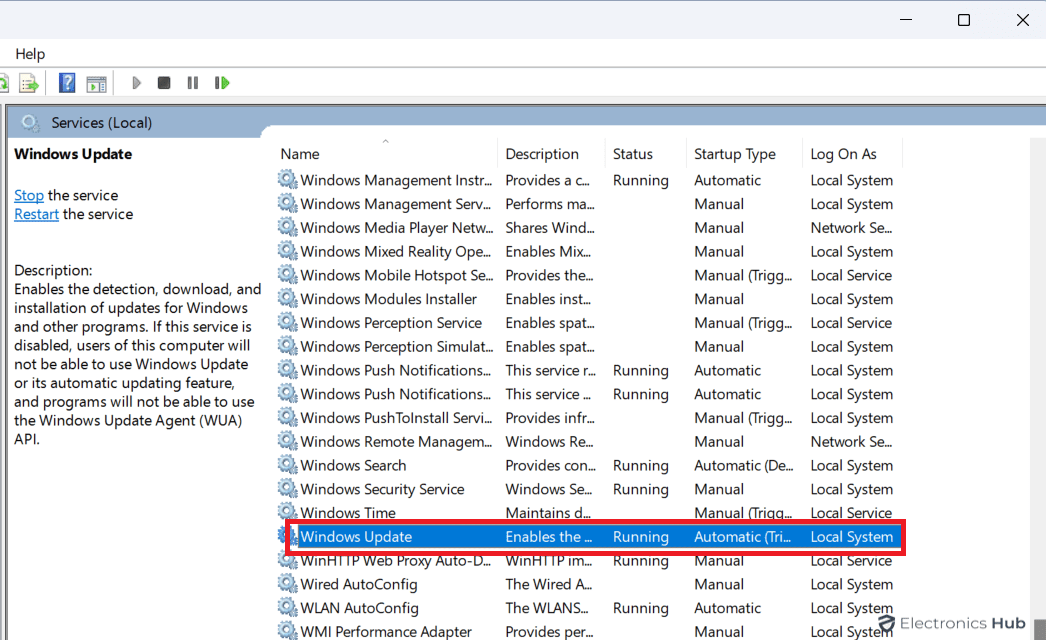
- In the Services application, scroll down the list of services until you find “Windows Update“.
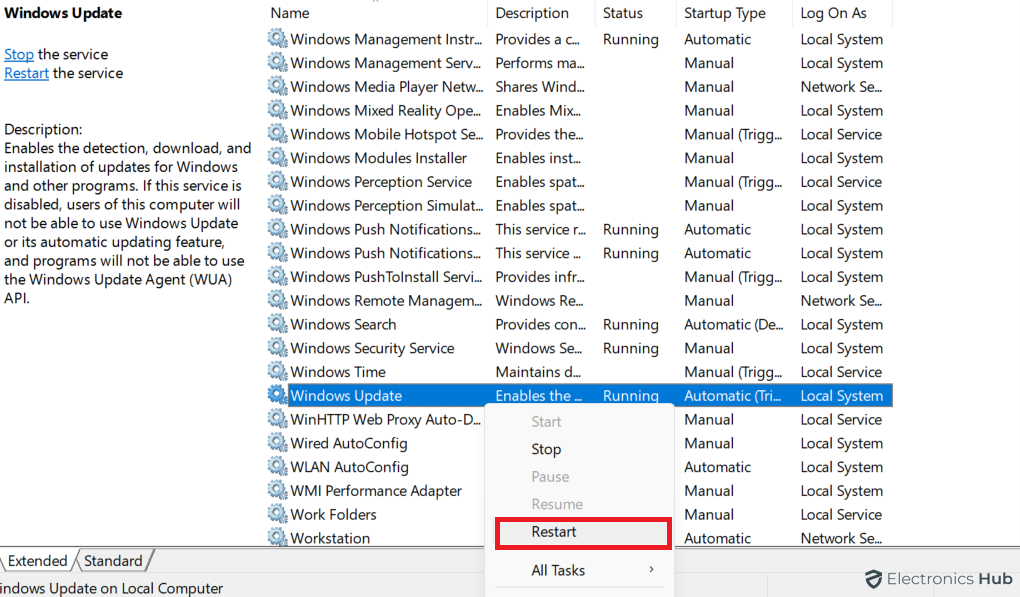
- Right-click on Windows Update and select “Restart” from the context menu. This will terminate and relaunch the services, potentially resolving any temporary glitches or resource spikes.
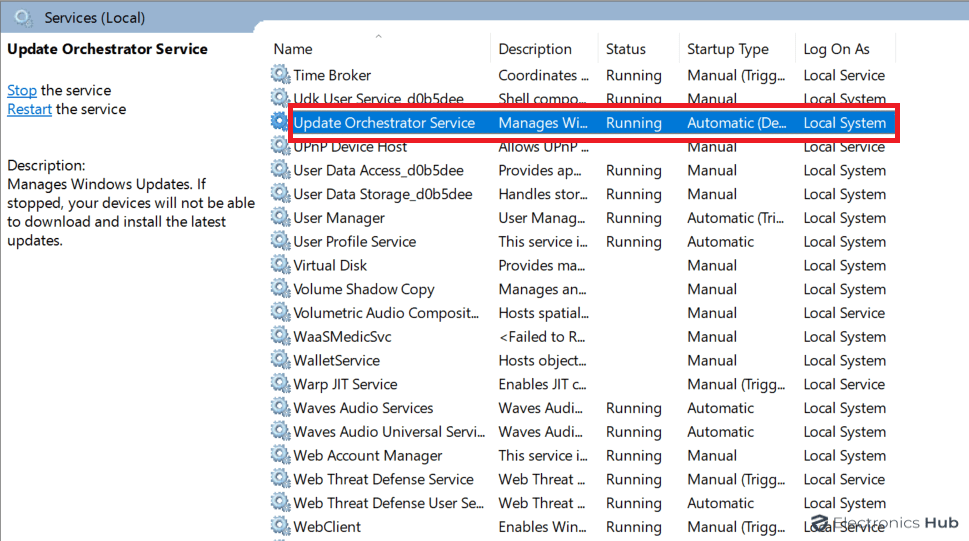
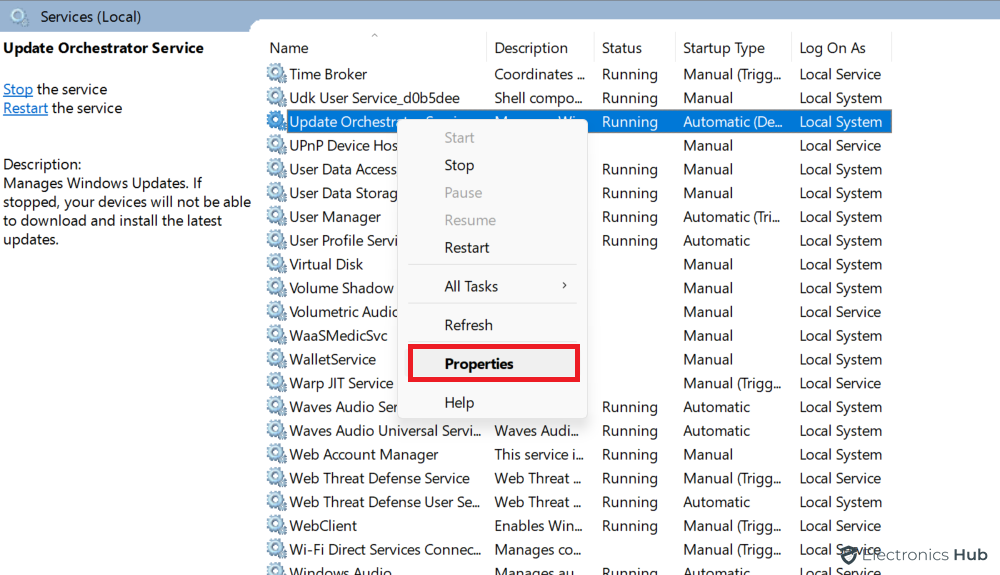
- To Disable Update Orchestrator Service, locate Update Orchestrator Service from the list of services.
- Right-click on Update Orchestrator Service and select “Properties” from the context menu.
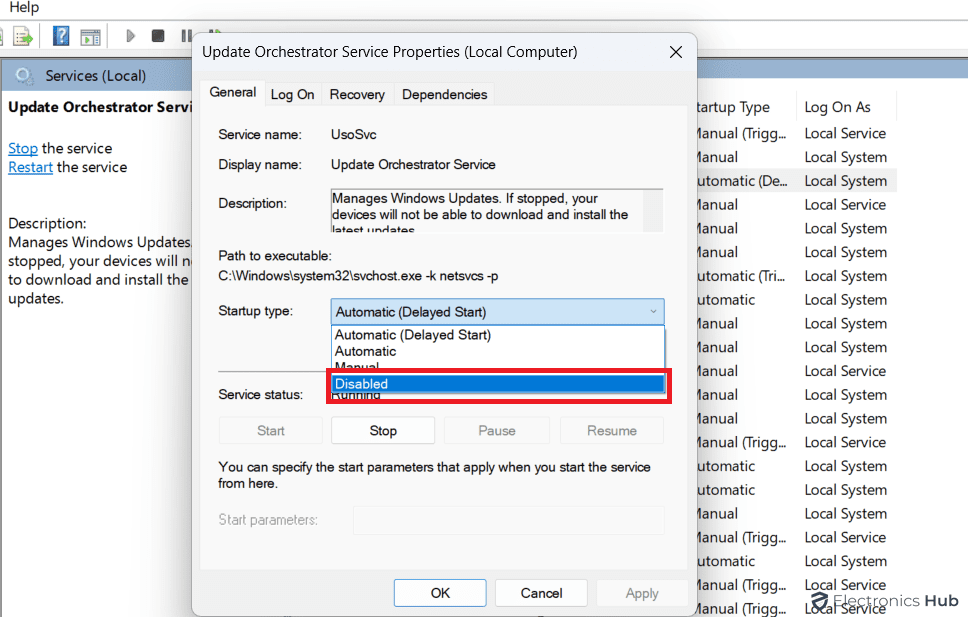
- In the Properties window, switch to the “General” tab. In the “Startup type” drop-down menu, select “Disabled” to prevent the service from starting automatically.
- Click on the “Apply” button to save the changes, and then click on the “OK” button to close the Properties window.
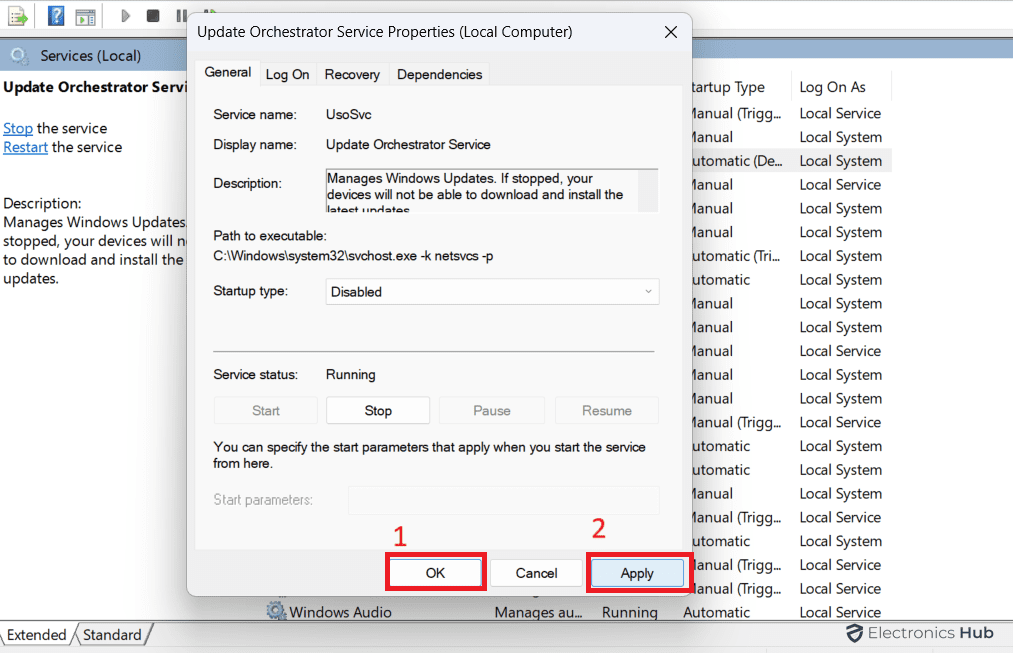
- Restart your computer for the changes to take effect.
8. Reset Windows to default power settings
Aggressive power settings can sometimes cause high resource usage by the MoUSO Core Worker Process:
- Click the Start button and type “PowerShell” in the search bar. Right-click on the “WIndows PowerShell” application and select “Run as administrator” from the context menu.
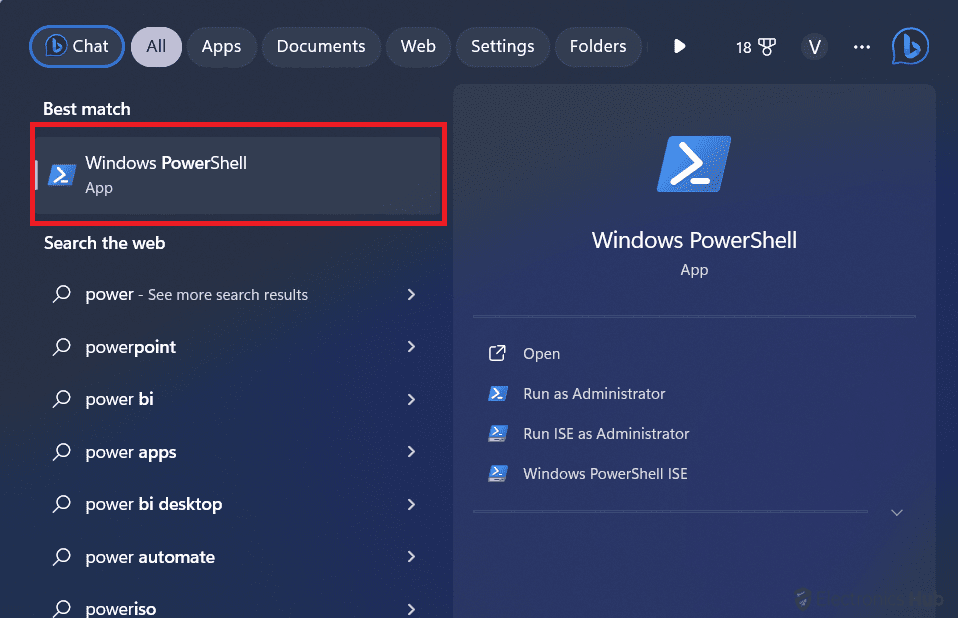
- When prompted by the User Account Control (UAC) dialog box, click on the “Yes” button to allow PowerShell to run with administrative privileges.
- In the PowerShell window, type in the following command and press Enter: powercfg – restoredefaultschemes

- This command will reset your Windows power settings to their default values.
- Allow the command to complete its execution.
- Restart your computer for the power settings changes to take effect. Upon restarting, your power settings will be restored to the default configuration.
MoUSO Core Worker Process – FAQs
Ans: MoUSO Core Worker Process is an Update Session Orchestrator (USO) that controls update sessions. It controls which updates must be installed first and which can be installed later. It manages the update session and resolves problems that can prevent Windows from updating.
Ans: You can stop the MoUSO Core Worker Process by using the Task Manager. However, it is not recommended to do this unless you are experiencing high CPU or disk usage due to the process. If you stop the MoUSO Core Worker Process, Windows will not be able to download or install updates.
Ans: You can prevent the MoUSO Core Worker Process from waking your computer from sleep by using the powercfg command-line tool. To do this, open a Command Prompt window with administrator privileges and type the following command: “powercfg -requestsoverride process MoUsoCoreWorker.exe execution”. This command will add the MoUSO Core Worker Process to the list of processes that are not allowed to wake your computer from sleep.
Ans: The MoUSO Core Worker Process can sometimes use a lot of CPU or disk usage, especially when it is downloading or installing updates. This is because the process is using a lot of resources to complete these tasks. However, the high usage should only be temporary, and the process should return to normal usage once the updates are finished.
Ans: The MoUSO Core Worker Process performs a variety of tasks related to Windows updates, including:
* Downloading updates from Microsoft’s servers
* Installing updates
* Verifying that updates were installed correctly
* Scheduling updates to be installed at a later time
Conclusion
The MoUSO Core Worker Process plays a crucial role in managing Windows updates, ensuring your system remains secure and up-to-date. However, it can sometimes consume excessive resources, leading to performance issues. By implementing the strategies outlined in this guide, you can effectively manage resource usage by the MoUSO Core Worker Process and maintain optimal performance on your Windows computer
