It is holiday season and with Christmas around the corner, we have made a Christmas themed project. In this article, I’ll demonstrate a DIY Arduino Christmas Tree Lights project using LEDs.
There are a few Christmas tree LEDs already available in the market but with circuit board. We thought, where is the fun in lighting up a Christmas Tree without decorations. So, in this DIY project, we have combined Electronics and Holiday Season and made a simple Arduino Christmas Tree Lights using LEDs.
An important point to note is that we will not be using an actual Christmas Tree. It is just a fun little DIY project for anyone who wants to mix Arduino and Christmas. So, let’s get started.
Construction and Output Video
Circuit Diagram of DIY Arduino Christmas Tree Lights
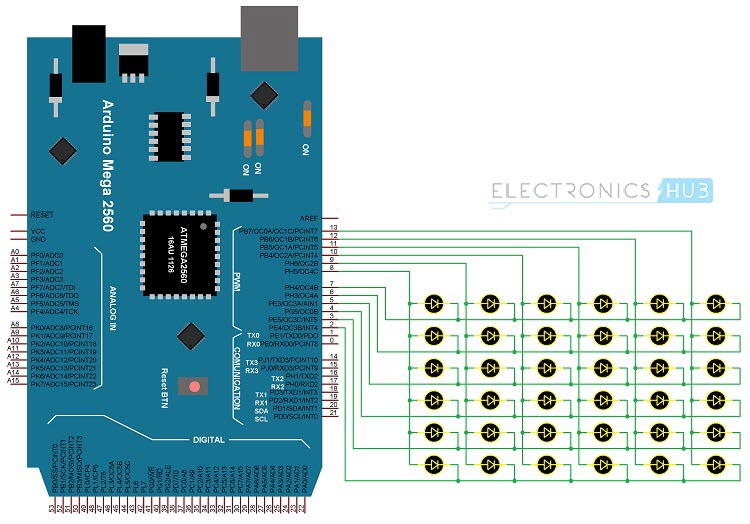
There is nothing interesting in the circuit diagram part of the Arduino Christmas Tree Lights Project as all you need to do connect a bunch of LEDs to Arduino. The number of LEDs depends on the size of your tree and in our case, we ended up using 27 LEDs.
Also note that we have directly connected all the LEDs to Arduino and made sure that only one LED will be turned on at any moment.
The arrangement of LEDs or rather the wiring of the LEDs is interesting because we went with a 6×6 matrix with 6 Cathode or GND pins and 6 Anode or VCC Pins.
NOTE: Due to problem with real estate on the Christmas tree, we used only 27 LEDs.
Components Required
- Sunboard Sheet (or any thick cardboard)
- Cutter
- Glue
- LEDs (# – depending on the size of the tree)
- Glitter and other decorating stuff
- Insulated Copper Wire
- Arduino Nano (UNO or Mega, anything is fine)
- Power Supply
Construction of the Christmas Tree
As mentioned earlier, the circuit part is easy but the construction part is the tricky one. I’ll show you how to make a simple Christmas Tree for the purpose of this project.
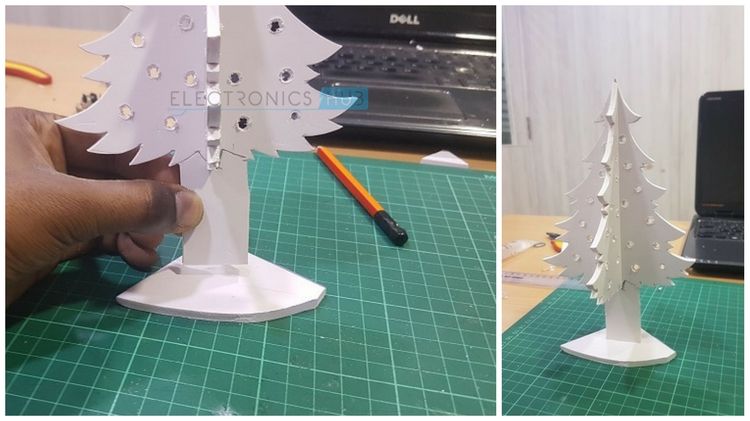
Take two Sunboard sheets, roughly about the size of an A4 Sheet and draw a layout of the Christmas tree on one sheet. You can take any reference from the internet.
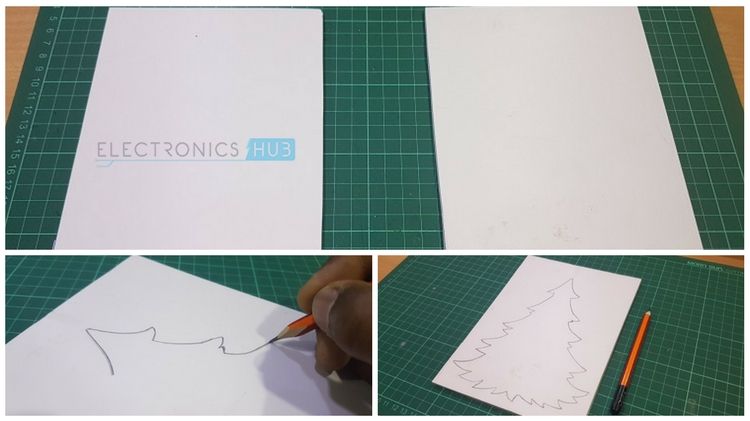
Using a cutter, cut out the Sunboard along the shape of the tree. Be careful when using the cutter as it is a very sharp tool.

Take the other Sunboard and draw a trace of the outline of the tree on it. Then cut this board as well. Also, make a branch like structure to support the tree.
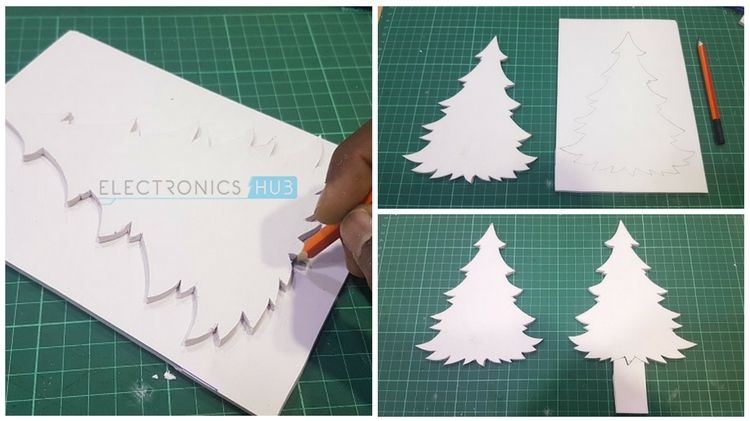
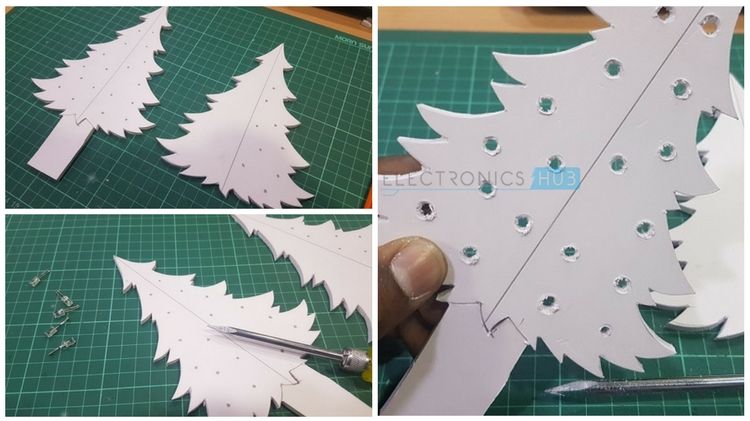
Draw lines in the center of the tree on both pieces. Mark points for LEDs: one either side of the line in one tree and on one side of the line in the other tree. Use a drill or a sharp tool to make holes in the tree. You will be inserting LEDs in these holes. So, make sure that the holes are of enough size.
Take the tree on which we marked holes for LEDs on one side and cut it into half along the line. Using quick glue, attach the pieces on the either side of the other tree as shown. The resulting structure will something similar to the one shown in bottom right.

Also, fix the branch to the tree and glue a temporary supporting base at the end of the branch, so that the tree can have a stable position.
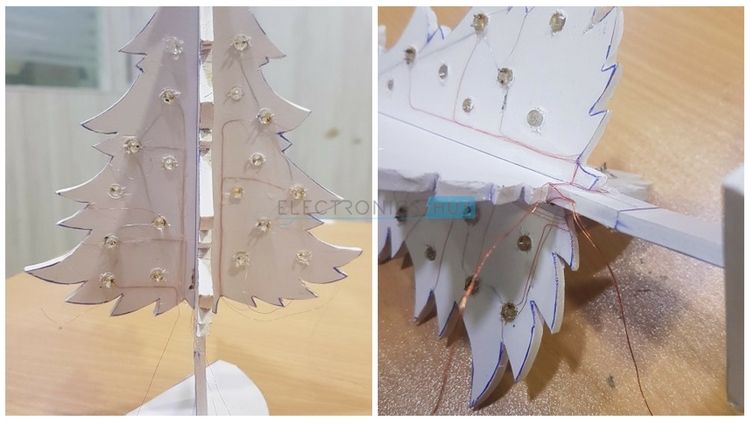
Now, insert LEDs into the holes and you can use glue around the LEDs so that they won’t wobble in the holes. Arrange the LEDs in an alternating way i.e. few facing one way and few facing the other.

We have arranged the LEDs in such a way that all the cathodes align to a single side. This will make our job easier while wiring the LEDs.
Coming to wiring the LEDs, we have used an insulated copper wire from an old motor. The reason for using this wire is that they can be twisted without any short circuit.

Skim the insulation of the wire on the parts where you want to solder and start soldering the wire to the LEDs. Since it is a 6×6 matrix, you will end up with 6 GND wires and 6 VCC wires.
Arrange all the wires and glue then to the surface. The final build will look something like this.

Make sure that there are no wires left loose or hanging. Twist all the wires and position them at the bottom. We have to connect all these 12 wires to Arduino.
Before connecting the wires to Arduino, let us make the base. Take a small piece of Sunboard sheet and attach two supporting sheets to form a base like structure. Remove the previously fixed temporary supporting base and fix the tree to the new base.
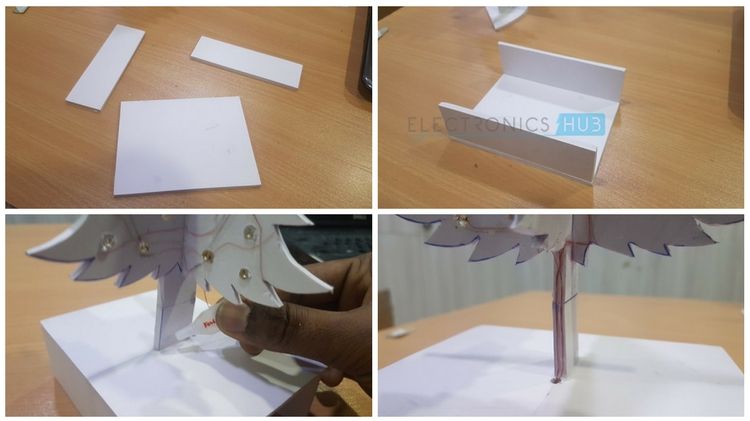
Make a hole adjacent to the tree’s stem to push all the wires down.
Now comes more soldering. Solder the wires (6 GND and 6 VCC) to male headers and these headers can be connected to any Arduino board like Arduino UNO, Nano or Mega.

We are coming to an end. Take some glue on a painting brush and apply it on the surface. Be careful and apply gentle pressure. When the entire side is applied with glue, sprinkle some green sparkles. Give it some time to dry and do the similar thing to all the side.

After the sparkles are completely attached to the surface, make additional decorations like gluing some colorful balls, adding a star on top, Rudolph, the reindeer and a Merry Christmas sticker. The Christmas Tree after all the decorations will look like this.

Working of the Project
A simple Christmas themed project named DIY Arduino Christmas Tree Lights using LEDs is implemented in this tutorial. The working of the project is very simple.
Since we have 6 GND pins and 6 VCC pins with respect to all the LEDs, connect them to the Arduino and control them using the program. Program in such a way that the LEDs produce eye-catchy effects. Have fun and we wish you a Merry Christmas.
NOTE: We have programmed the Arduino in such a way that only one LED is turned ON at a time.
Applications
- A simple DIY Arduino Christmas Tree Lights using LEDs can be implemented by anyone who wants to make a fun project for Christmas.
- Instead of making your own tree as shown in this project, you can decorate an actual Christmas Tree with LEDs and program them using Arduino.

4 Responses
I sant code for cristmus tree project
Where can I find the code for this?
Hi
Great work, where can I find the code for this project?
Thanks
Could I have the code?